Scene
- 4A Games
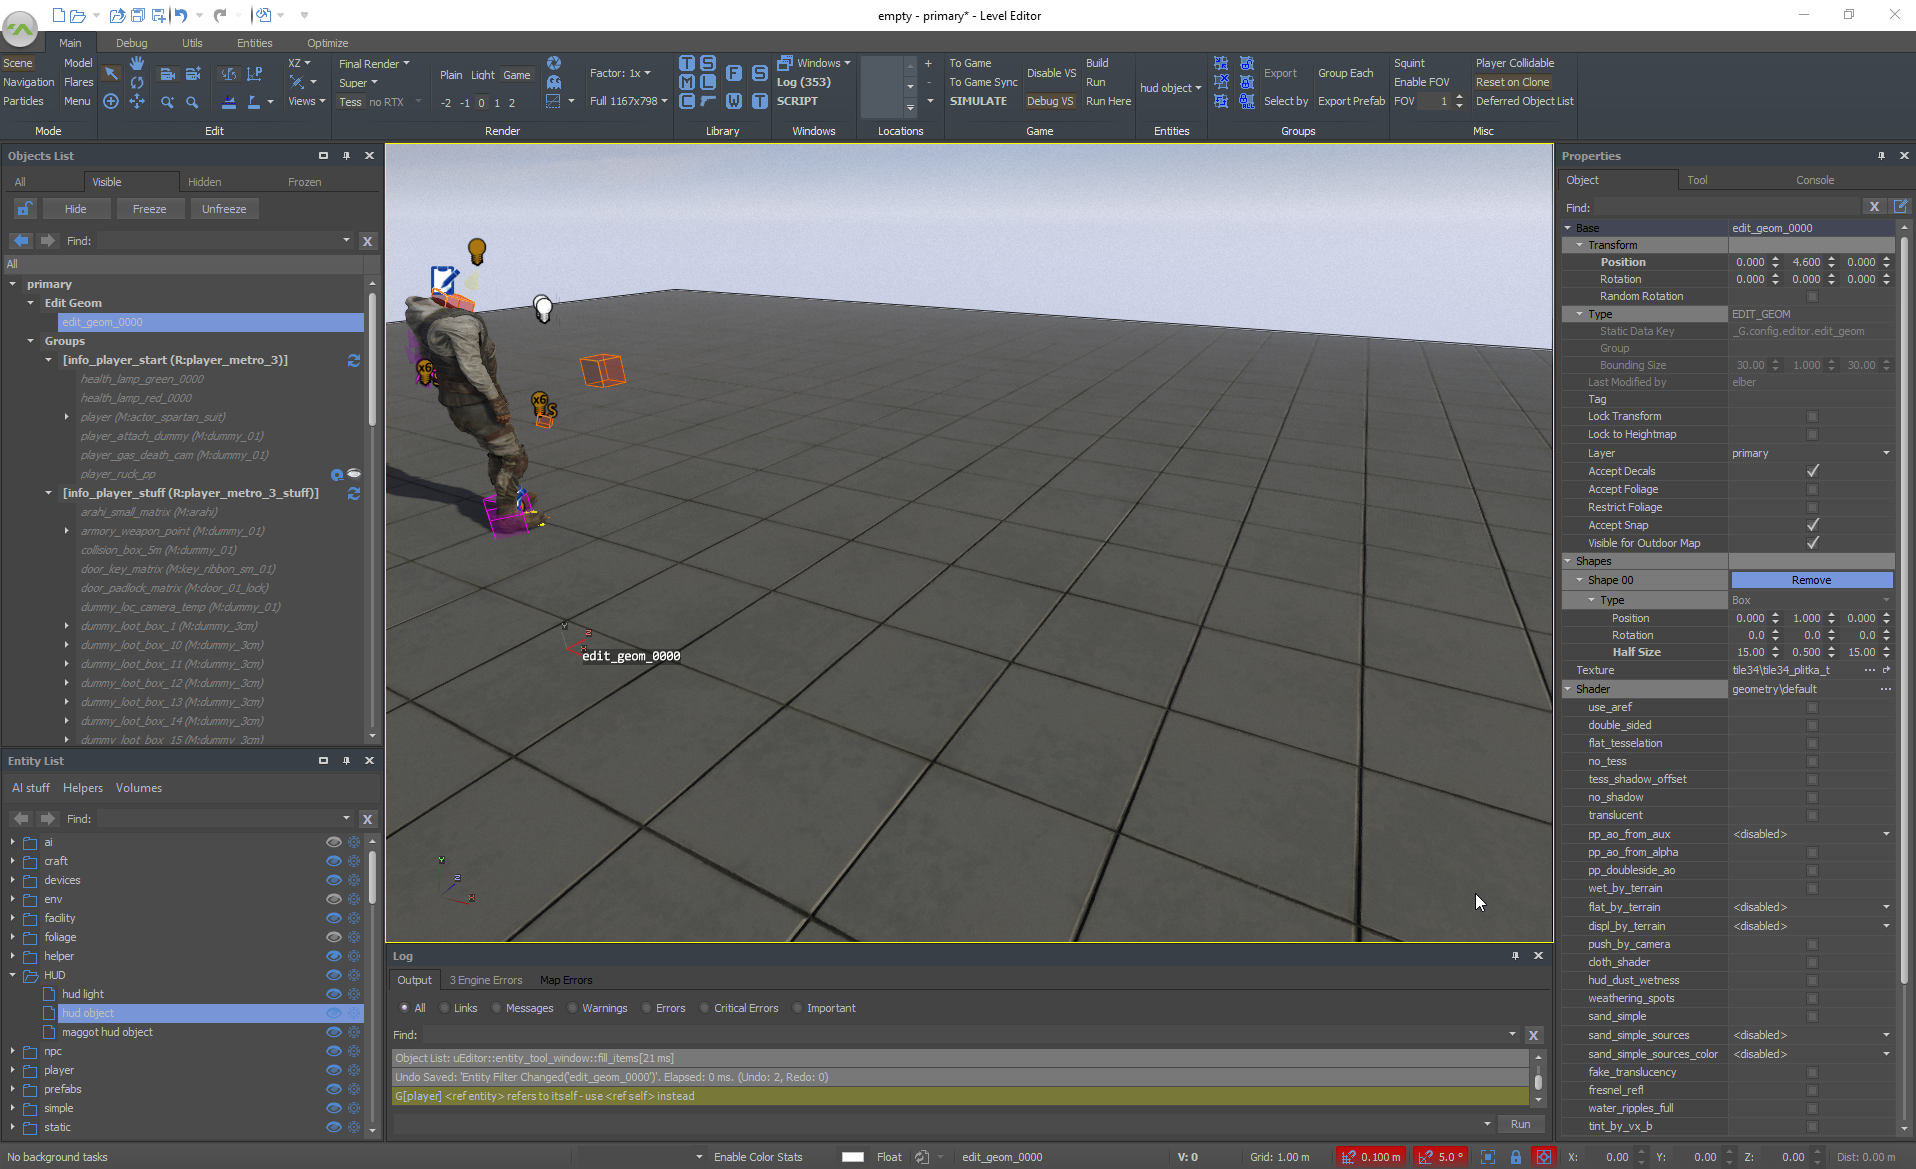
Overview
The Scene Tool is the main tool that you will use while working on a level. It is mainly used for adding and manipulating all kinds of objects inside a level, from NPCs and weapons to patrol points, restrictors, and proxies.
Toolbar buttons
Edit
These functions are for navigating the viewport and to place, move, scale, and rotate objects.
.png?version=1&modificationDate=1664449094732&cacheVersion=1&api=v2)
Cursor modes:
- Select (shortcut: S)
- Add (shortcut: A)
- Move (shortcut: T or W)
- Rotate (shortcut: E or Y)
- Scale (shortcut: R or H).
Since the Select mode doesn't allow you to move, rotate, or scale selected objects, it is HIGHLY recommended to keep hitting the "S" key from time to time when roaming around the scene to ensure you stay in Select mode when not actively transforming objects. This will prevent accidental transformations or mis-clicks.
Camera modes
- Game camera style. Controls: hold SHIFT or MMB + WASD + mouse movement. Press Caps Lock to drop the camera to the ground.
- Arcball camera style (controls: hold ALT+MMB).
Camera styles are very important for navigating the Active Viewport / Active Window. You might want to check that section for details:
| 3D Viewport |
Zoom controls
- Zoom All. Zooms the camera to overlook all objects in the scene.
- Zoom Selected. (Shortcut: Home). Zooms the camera to the selected object.
Snap
- Move Snap. Snap the object to the grid while moving. "[" and "]" keys change the grid size. (Shortcut: Alt+T).
- Rotate Snap. Snap the angle of rotation to five-degree increments. (Shortcut: Alt+Y).
- Pivot Mode.
Align
- Random align – Placement of objects with random rotation and scaling (Ctrl+T).
- Edge Align – When Edge Align is enabled (look for the EA button on the Scene toolbar), this will align to the edge of the polygon.
- Normal align.
Axis
- When not dragging the Gizmo directly, you can select which active Axis to apply when Moving, Rotating, or Scaling an object (Shortcut: numbers 4, 5, 6, 7, 8, 9, 0 on keyboard).
- Select which Coordinate System to apply when Moving, Rotating, or Scaling an object – World, Local, or Screen (Shortcut: numbers 1, 2, 3 on keyboard).
- Select which Viewport Preset (in relation to the Selected Object) to activate.
Ctrl + Shift + End to Drop
You can perform a regular “Drop” by pressing Ctrl + End. This snaps the object to the terrain/ground underneath.
By pressing Ctrl + Shift + End, you can snap the object by the bounding box (lowest point).
This is mostly useful for "dropping" objects with free pivots or restrictors, and editing geoms.
Vertex Snap Tool
Vertex Snap (hold V when using the scale tool). Snap constrain/direction depending on which face you've selected.

You can move and rotate the highlighted objects via arrow buttons.
Shortcuts:
- Arrow buttons – dragging (rotating);
- Page up/page down – raise/lower the object along the y axis;
- Ctrl + [ ] – increase/decrease the angle of rotation;
- [ ] – grid size.
View and Render
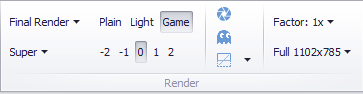
- Render mode (shortcut: Shift+1-7)
Note that you should press every number key multiple times while holding Shift to cycle through different variations of each Render mode.
- Final Render (Shift + 1)
- -=PBR Check=- (Shift + 1,1)
Check your PBR material – Shift + 1, 1. Generally, if you see Red, the albedo is wrong. If you see Green, the gloss is wrong. If you see Blue, the reflectivity is wrong. If you see another color, this means there is a mix of problems and this material needs major reworking. Small colored areas are not bad, however. We need at least 75% of the screen to be pure PBR.
The colors are ordered by importance, R-G-B: Red = huge problem, Green = big problem, Blue = small problem.
- Render quality
- Exposure mode
- Exposure multiplier (0 = neutral exposure, -2 = darkest, 2 = brightest)
- Ignore portals (special debug feature, mainly used to work more easily with interiors)
- Ignore ghosts
- Shape wire mode (Regular / On top / Solid)
- Resolution factor (use 2x for a clearer picture, especially if you're an artist; use 1/2x for better performance)
- Resolution / Aspect ratio mode (Shortcut: Ctrl + / to set the default resolution).
Library
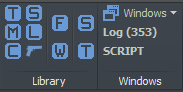
This section is where you can access specific auxiliary smaller-scale in-house editors that are integrated into Exodus SDK.
- Texture Editor
- Material Editor
- Color Animator
- Sound Editor
- Localization
- Weaponry
- Foliage Manager
- Weather Editor
- Super Static Tool
- Track Editor
Windows
This section is a collection of specific windows that are available in the current Editor Mode (Scene, Navigation, Model, etc).
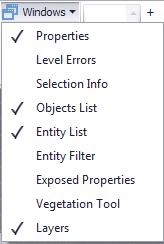
Windows - Opens a context dialog with a list of all the scene tool windows.
Log (<number>) - Message Log window access. The number in brackets shows the current number of important errors found. The log is also the place where you can input console commands.
Not all of the errors are to be attended by every developer personally; some should be attended by you, especially if you know how to fix them right away, while others may need to be reported to appropriate departments instead. Keep that in mind when interacting with the Log.
SCRIPT - Opens the mighty VS Editor
Locations
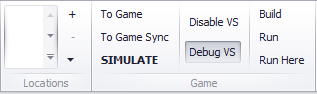
You can add location bookmarks for easier navigation throughout the scene by using these buttons:

- + : to add a location bookmark
- - : to remove the currently selected location bookmark
- ↓ : to access additional navigation options
- Go to Pos... : lets you specify the location manually, with camera Position & Rotation coordinates
- Go to Player : moves you to the current player's location
- Go to Tag... : lets you specify a screenshot that contains the coordinates in its name, and move to that location.
A more effective way to use screenshots as location bookmarks would be the following:
1) Navigate to the camera location where you want to save the screenshot, then hit F12. The screenshot of the location will be saved to \temp\screenshots.
2) Drag and drop the screenshot, providing it still has its original complicated name, directly into the Viewport. Exodus SDK will then navigate to that location.
Sharing and/or uploading screenshots, which were created in Exodus SDK with the F12 key, is a fast and effective way to communicate camera positions between team members, be it programmers investigating a bug or artists decorating your carefully crafted gameplay sandbox.
Game Simulation
.png?version=1&modificationDate=1664449093475&cacheVersion=1&api=v2)
- To Game – Start the game. (Shortcut: F5).
- To Game Sync – Start the game and spawn the player at the current position of the camera. (Shortcut: F6).
SIMULATE – Start the game but do not assume control of the player, keeping control of Exodus SDK (same as using the goto_editor 1 console command from To Game).(Shortcut:Shift+F5).
Note that any and all changes made to the scene during the Simulation Mode (when SIMULATE is active) will NOT remain there once the simulation is finished. There are some helpful advanced techniques that rely on this feature but we'll cover them later.
!!! Remember that you can use the shortcut, Ctrl + Esc, to end the simulation/game mode.
- Disable VS – Disables visual scripts.
- Debug VS – Enables visual script debug.
- Build – Builds content of a currently open map. The content is saved to cache and can be run at any time, but if you want to see those changes in the build, you will need to rebuild the content every time you change anything on the map.
- Run – Runs the level in MIXED mode. You need to build the level first. You only need to build the level once in order to run it. This mode is useful for testing save/load bugs. It is also more optimized than running the game from Exodus SDK, which often results in better framerate.
- Run Here – Same as Run, but the player spawns at the camera's current position.
Entities / Objects to Add
This window contains the list of all game objects that can be placed in the scene. By selecting an entity from the list, you can switch the scene tool to Add mode which allows you to place the object into the scene. This is similar to the Entity List window, except that you can place objects right away, as seen here:
.gif?version=1&modificationDate=1664449093273&cacheVersion=1&api=v2&width=324&height=416)
On the top of the drop-down menu, the last selected types of objects are displayed. After restarting Exodus SDK (providing the level has been saved), the Entities menu will display the last selected object type.
You can also place an object of the last selected type (shown in the Entities menu) into the scene simply by hitting the A button (shortcut to select the "Add" Cursor Mode) and clicking in the Viewport:
.gif?version=1&modificationDate=1664449093064&cacheVersion=1&api=v2&width=958&height=380)
Groups
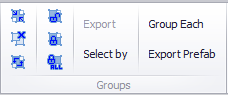
This is where the Group- and Prefab-specific operations are carried out.
- Group – Creates a group from selected objects.
- Ungroup – Removes all objects from the selected Group and then destroys the group itself.
- Refresh – Refreshes the group according to its Reference which leads to the respective *.LUA file located in the content\groups\ directory.
- Open – Opens the selected group so that you can access the objects inside it (Shortcut: G if the selected group is currently Closed).
Close – Closes the selected group so that you can access the group as a single entity which is necessary before using Export (Shortcut:G, if the selected group is currently Opened).
The G shortcut key toggles the group's status between Opened and Closed.
- Close All – Force closes all the groups in the level, including groups inside other groups (this is a very handy operation before using Export).
- Export – Exports the current group to a level-independent *.LUA reference file in the content\groups\ directory (useful for typical gameplay solutions such as doors, switches, loot items, etc.).
- Select by – Selects all the groups in the level according to their *.LUA reference; useful for pinpointing several typical groups and then doing some mass-manipulation on them, e.g. rotating all doors on the level upside down.
- Group Each – Creates individual groups from the selected objects, each object being the sole member of its own group.
- Export Prefab – Exports the current group to a level-independent *.LUA prefab in the \content\prefabs\ directory; useful for typical gameplay solutions such as doors, switches, loot items, etc.; Prefab is a special version of our regular Group feature, which is covered in other tutorials.
We have a lot of prefabs and groups in the game. When the player has cleared a part of a level and cannot reach it again, we use a proxy to destroy that area.
It is not possible to attach Prefabs and Groups to anything but you can attach any objects that are inside them.
In the Objects List window, select all objects inside the prefab, just as you would when selecting objects inside a group. Highlight your proxy → RMB Click → Highlighted → Attach selected to proxy.
Works like a charm!
Miscellaneous
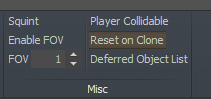
- Squint – Applies a specific debug-only Blur effect to the viewport; its purpose is to help assess the "readability" of the level design and/or color coding.
- Enable FOV – Applies the specified FOV multiplier to the viewport; its purpose is to help compose a scene designed for a special FOV, e.g. a special cutscene or a scripted gameplay effect.
- Draw Entity Spheres – Renders special transparent spheres at the positions of all the objects to assess the density of objects – for optimization purposes.
- Draw Entity Crosses – Renders special debug crosses at the positions of all the objects to assess the density of objects – for optimization purposes.
- Cull Dist – If enabled, the Cull Distance property of objects will be taken into account, and will not render any Entity Spheres or Entity Crosses located outside the specified Cull Distance – for optimization purposes.
- Player Collidable – Paints the entire geometry with a specific shader that the Player Character can collide with, for debug purposes.
- Deferred Object List – If enabled, the Objects List window will not be refreshed while selecting objects in the Viewport, up until the next time you focus on the Objects List window manually – this is helpful for performance while working on highly complex levels with hundreds of thousands objects.
Exodus SDK © 2005-2023, 4A Games Limited. Developed by 4A Games®.
4A Games® is a registered trademark, and 4A Games Limited, Exodus SDK and their respective logos are trademarks of 4A Games Limited.
Published by Deep Silver. Deep Silver is a division of PLAION GmbH, Austria. Deep Silver and Plaion are registered trademarks of PLAION GmbH.
Metro Exodus is inspired by the internationally best-selling novels METRO 2033 and METRO 2034 by Dmitry Glukhovsky.
All other trademarks, logos and copyrights are property of their respective owners. All rights reserved.
By using this site, downloading or using the Exodus SDK or related content, you are agreeing to be bound by the terms of the End User License Agreement.